


We Hope You Enjoy Reading Our On-site Blogs

3 Steps for Fixing Sagging Gutters
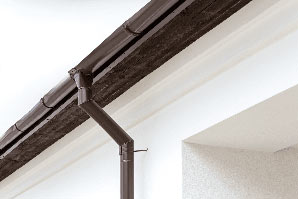
Sagging gutters are an eyesore and are also a source of potential damage to your home. The weight of water inside gutters that droop can put pressure on the fascia and result in siding being torn away, splitting wood, and leaking over windows or doors Fortunately, the problem of sagging gutters is one that most homeowners can fix fairly easily and inexpensively. Below are the materials needed and step-by-step instructions for replacing old hanging hardware with new gutter screws and ferrules.
1.
Prepare for Working SafelyEven though you are probably eager to begin, it is important to slow down and make preparations for working safely before doing anything else. Replacing gutter hanging hardware is perfectly safe as long as you take the right precautions, and you will need to do the following first.
Watch for Power Line Hazards
Since the incoming electrical main is often anchored at the roof line, gutters will be in close proximity to power lines containing 240 volts. That means even a slight misstep could result in a serious or even fatal electrical shock.
In addition, keep in mind that aluminum is an excellent conductor of electricity and can carry a dangerous current a long way. As such, be sure that gutters are not in danger of falling and touching energized lines. If there is any doubt about your ability to work safely, then talk with a qualified installer to perform the work.
Use Caution When Working on a Ladder
Before you climb on a ladder, be sure the feet are firmly and evenly planted on the ground. Never climb on a ladder that is not stable or that is resting on soft or sloping soil. In addition, heed all printed safety warnings, and if you are on a stepladder, do not exceed the recommended climbing height or stand on the top rung. Ask for help in securing the ladder if you are climbing higher than ten feet off the ground.
2. Identify the Problem and Solution
Once you are certain you are able to work safely, then you are ready to remove the old gutter hanging hardware. When you look inside the gutters, you will notice metal ferrules, which are thin-walled tubes made of aluminum, spanning from one interior wall of the gutter to the other interior wall.
Inside the ferrules are gutter spikes, which are simply long galvanized nails. The ferrules maintain rigidity and the nails provide support by attaching everything to the fascia. However, ferrules are prone to bending over time, and gutter spikes also bend and slowly work back out of the fascia.
The solution to the problem of failing ferrules and spikes is to replace the components. You will need to utilize hard plastic ferrules that won't bend and replace spikes with gutter screws that will grab the fascia and not easily back out of the wood.
3. Remove Old Hardware and Install New Hardware
Beginning at any convenient point, clean out any debris that might be inside the gutters. You need to remove excess weight that might cause the gutters to fall as supports are replaced. Once the gutters are clean, remove no more than a couple of old gutter spikes and ferrules at a time. You can use a claw hammer or short pry bar to remove the spikes, but be sure not to crush the gutters or lose your balance should the spikes suddenly pull free from the fascia.
After removing one or two of the old ferrules and spikes, insert the plastic ferrules between the gutter sidewalls and line them up with the existing holes in the gutter. Next, while holding the new ferrules in place, insert gutter screws into the holes and slip them through the ferrules.
Use a cordless drill with a screwdriver bit to drive the gutter screws into the fascia; it is best to move the screws up or down a fraction of an inch and drive them a new hole that you make. Do not over tighten the gutter screws to avoid breaking the ferrules or warping the gutters.
Continue the process of removing old ferrules and spikes and replacing them with new hardware. Once you are finished, double check your work by running water into the gutters with a garden hose to ensure the flow is still smooth and draining is adequate